|
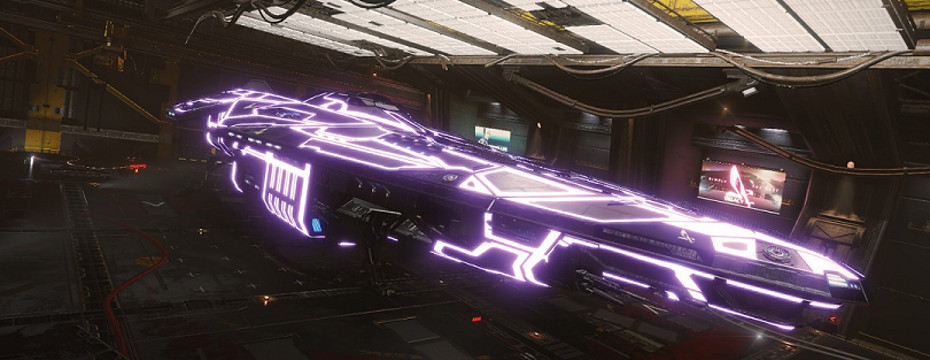
The Anaconda is the pride of Faulcon deLacy's ship yards. The design was first manufactured in 2856 by RimLiner Galactic. After numerous mergers the template was eventually owned by Faulcon deLacy, who have made only minor changes to the classic design. The Anaconda is a versatile craft that can transport large cargos as well as pack a decent punch. Some smaller navies use the Anaconda in the light cruiser and frigate roles. The Anaconda can also be upgraded with a docking bay allowing small fighters up to Sidewinder size to be carried and launched.
|
 |
Anaconda Specifications
Basic info
Manufacturer: Faulcon DeLacy
Dimensions:
152.4m L - 61.8m W - 32.0m H
Landing pad size: Large
Type: Heavy Multipurpose
Mass lock factor: 23
Number of seats: 3
Fighter capable: Yes
Price
Base cost: 146,969,450 Cr
Insurance: 7,348,472 Cr
t = tonnes
m/s = meters per second
Ly = Light year(s)
MJ = Mega Joules
|
Tech specs
Top speed: 180 m/s
Max speed: 209 m/s
Boost speed: 240 m/s
Max boost speed: 278 m/s
Agility: 95
Shields: 350 MJ
Armor: 945
Hull mass: 400 t
Cargo capacity: 114 t
Max cargo: 468 t
Fuel capacity: 32 t
Unladen jump: 9.00 Ly
Max jump: 41.43 Ly
|
Hardpoints
Utility slots: 8
Small hardpoints: 2
Medium hardpoints: 2
Large hardpoints: 3
Huge hardpoints: 1
Internal compartments
Size 1: 1
Size 2: 1
Size 3: -
Size 4: 3
Size 5: 3 + 1 military
Size 6: 3
Size 7: 1
Size 8: -
|
|
As far as most people are aware, the fastest man-made (pilot carrying) vessile is the US Space Shuttle. Clocking in at an amazing 17,500 MPH (28,000 KPH).
From there we get to the SR-71 with an un-classified speed of 2192 MPH (3529 KPH) or Mach 3.3 which by any standard, is movin!
Having actually worked along-side these amazing machines, there is always an "itch" I could never explain.
|
 |
Now I know ED is a video game, but with all that you can do, there is still the desire to go faster!
For the record, I am a winner of the "Mach 6 Challenge" in Kerbal Space Program for air breathing, jet powered flight!😝
But I digress. Out of the box, the Anaconda can do 41.43LY jumps on first purchase. What we are gonna do, is min-max the shit outta this build!
|
In Thrust We Trust
- Space Jesus
Worthless Trivia #1: Our sun (Sol) is 5.9 billion KM from Pluto or 39.482AU (avg) or 0.000779 Light Years (LY)
Of course the first thing you need to do is buy an Anaconda. There are various options to get one at a serious discount. This is outside the scope of this article. You can Google that yourself!
You will also need access to some specific modules. You can either jump around the bubble to get the best deal, or go to a station that has them all. If you don't have access to "Jameson Memorial" station in Shinrata Dezhra, I suggest going to the planetary station "i Sola Prospect" in the Brestla system planet A 1.
When you buy your Anaconda, it will come with the following modules already installed:
|
Core Internal
1C Lightweight Alloy
8E Power Plant
7E Thrusters
6E Frame Shift Drive
5E Life Support
8E Power Distributor
8E Sensors
5C Fuel Tank (32t)
|
Optional Internal
6E Cargo Rack (Cap:64)
5E Cargo Rack (Cap:32)
6E Shield Generator
4E Cargo Rack (Cap:16)
1E Cargo Rack (Cap:2)
1E Supercruise Assist
1l Planetary Approach Suite |
Hardpoints
1F Fixed Pulse Laser
1F Fixed Pulse Laser
Utility Mounts
None
|
So we want speed. The easiest way to think about it is speed = light weight. So with that in mind, sell off everything in the Utility Mounts and Hardpoints. It's excess weight you don't need.
Next, sell off all except the Planetary Approach Suite (PAS) in Optional Internal. The PAS has no mass (magic box!) so it's OK to leave it in. Plus if you want to land on a planet, you'll need it.
Now lets swap out some of the Core Internals for some jumpy jumpy goodness
1C Lightweight Alloy ==> (no change) 1C Lightweight Alloy
8E Power Plant       ==> 2A Power Plant
7E Thrusters         ==> 5D Thrusters
6E Frame Shift Drive ==> 6A Frame Shift Drive
5E Life Support      ==> 5D Life Support
8E Power Distributor ==> 1D Power Distributor
8E Sensors           ==> 8D Sensors
5C Fuel Tank (32t)   ==> 4C Fuel Tank (16t)
"D" rated modules are the lightest you can get. "A" rated are the most powerful.
Now lets put some stuff back into the Optional Internal slots
7 - 7A Fuel Scoop (You CANNOT scoop neutron stars without one! Or basic fuel for that matter! DON'T SKIMP!)
6 - 2E Cargo Rack (4 ton capacity)
6 - empty slot
6 - empty slot
5 - 5H Guardian Frame Shift Drive Booster
5 - empty slot
5 - 2E Cargo Rack
5 - empty slot - Military (Restricted) Use ONLY
4 - 4A Auto Field-Maintenance Unit (AMFU)
4 - 4A Auto Field-Maintenance Unit
4 - 1D Repair Limpet Controller
2 - 1E Advanced Docking Computer (ADC)
1 - 1E Supercruise Assist (SCA)
1 - 1l Planetary Approach Suite
Of the 6 modules you just installed, only 2 have any mass. The Guardian FSD Booster and the Repair Limpet Controller. This is offset with the 10LY additional range the FSD Booster gives. 👍
I've included two 4A AMFU's so you can repair both. An AMFU cannot repair itself. An AMFU also cannot repair the hull, so a Repair Limpet Controller is needed. The 1D is the lightest and only costs 0.07LY from your range, so why not. Remember to NEVER load limpets! Limpets add weight that will shorten your max jump range. You can synthesize limpets when needed.
I've added a 2E Cargo Rack with a 4 ton capacity. When you synthesise limpets you get 4 each time. Since you will NEVER have cargo on board, the 2E is big enough to hold all 4 so you do not waste materials synthing 1, 2 or 3. Never waste MATS!😉
Reminder: Limpets = Weight = Reduced Jump Range
The 5C Fuel Tank holds 32 tonnes of fuel. Swapping it out with a 4C cuts your fuel in half (16t) but adds 2.4LY to your range.
Now we get to the Engineering section. Did I mention you'll need engineering?🤣 A lot of it!?😭 Huh...well now you know. Get to the closest engineer and land. You need loads of experimental effects, which can only be applied when at an engineer.
Lets take a look.
   (Module)              (Applied Blueprint)                (Applied Experimental Effect)
1C Lightweight Alloy ==> Lightweight (Grade 5)          ==> No experimental effect
2A Power Plant       ==> Overcharged (Grade 5)          ==> Stripped Down
5D Thrusters         ==> Dirty (Grade 5)                ==> Stripped Down
6A Frame Shift Drive ==> Increased Range (Grade 5)      ==> Mass Manager
5D Life Support      ==> Lightweight (Grade 5)          ==> No experimental effect
1D Power Distributor ==> High Charge Capacity (Grade 5) ==> Stripped Down
8D Sensors           ==> Lightweight (Grade 5)          ==> No experimental effect
4C Fuel Tank (32t)   ==> No engineering
So most of this should be self explanatory, we want to get the weight down on everything.
REMINDER: Engineering to Grade 5 is REQUIRED to get max range!
The Thrusters can be either Dirty or Clean as long as you apply the "Stripped Down" experimental effect. This is mostly a preference thing.
Since the Power Plant and Power Distributor are far below what can be installed, you need to crank the output up greatly in order for the ship to fly. However these two are the smallest you can stick on without running into serious power issues during flight or mega overheating problems when refueling.
Now lets take a look at the jump range improvement, what you've just accomplished.
Light Year Ranges (in LYs)
First Purchase: 41.43
After Upgrades/Engineering: 83.51
Synthesis - FSD Injection
Basic (+25%): 104.39
Standard (+50%): 125.27
Premium (+100%): 167.02
White Dwarf (+50%): 125.27
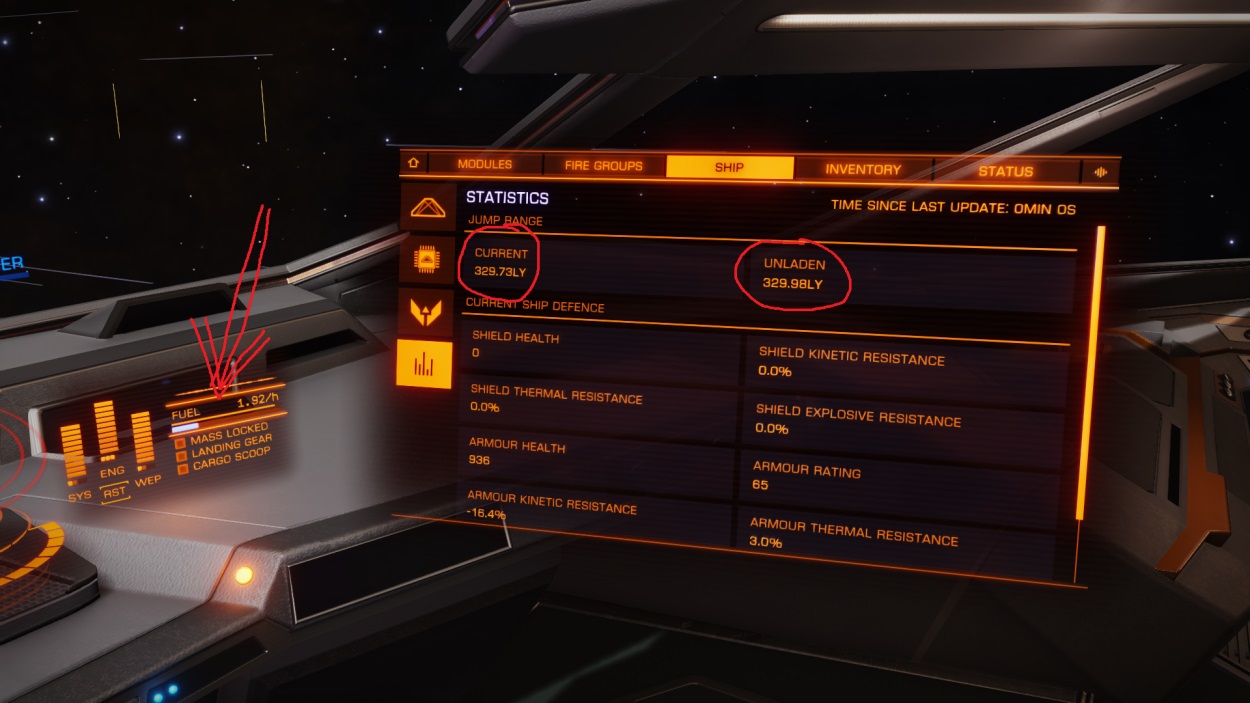
Neutron Star (+400%): 334.04
So congratulations! You are now the proud owner of a JUMPACONDA!
Have fun and fly DANGEROUS! In Thrust We Trust! Power To Spare!
I have seen a build where the Power Plant is a 2D, 4D Thrusters and a 4C Fuel Tank. The problem with this is every time you jump into Super Cruise or Hyperspace you over heat. Every time! Refuelling is also very difficult with this config. With a 7A Fuel Scoop you can only stay as long as you have Heat Sinks (HS) to cool your ship. Plus, if you added HS's it will reduce your range by .2LY for each one, but these changes make them un-powerable during flight. That and each max range jump completely empties your fuel tank, so unless you jump to a fuel star each time, the Fuel Rats will become your best friend! Having said all that, it would bring the max range to 84.17
 |
One last trick!
When fuelling, it you know you're going to be Neutron jumping, try to keep the 4C tank at less then half for the final jump. The reduction of weight will give you 300LY's every time. If you do it right, then you are about to do a MAX RANGE jump
This build is a Jumpaconda with an SRV bay loaded!
This build is called the One Way Trip was built for one purpose. To get to the Anaconda Graveyard!
|
One final note...
This build results in no boost! Pressing the "boost" button results in a nasty message on screen "insufficient power". So if using and hearing the boost is important to you, then simply increase the Power Plant and Power Distributor until the boost option returns. This will (obviously) reduce your range, but give you the boost option.
There are two ship building helper websites to assist you.
The first is CORIOLIS.IO which is a good site, clean layout, just don't forget to scroll down to see hidden data.
==> Long Link<== Short Link (when it's working): https://s.orbis.zone/iigf
The second is EDSY.ORG which (in my opinion) is a better layout and no scrolling.
==> Long Link <== Short Link: https://edsy.org/s/vsKJ0ls
Hope this helps you in your travels Commander.
Fly dangerously!